
Designing the Ultimate Wonderland Roblox Banner: Art Style and Creator Guide
Learn how to design a stunning Wonderland Roblox banner. Explore the game's creepy toy-carnival art style, GFX tips, and asset creation.
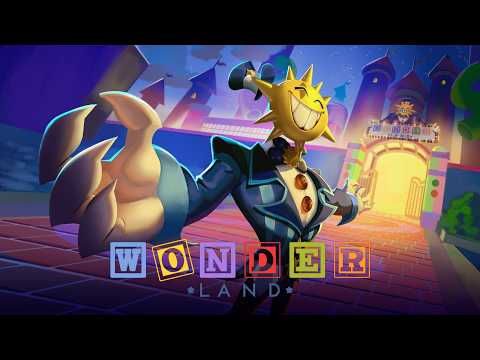 Official mediaLearn how to design a stunning Wonderland Roblox banner. Explore the game's creepy toy-carnival art style, GFX tips, and asset creation.YouTube
 Are you looking to upgrade your profile or channel art with a spooky, high-quality wonderland roblox banner? With ScaryPlay's highly anticipated survival horror game taking the platform by storm, creating a custom wonderland roblox banner is the ultimate way to show your love for the game. Whether you are a YouTuber, a Twitch streamer, or a graphic designer, finding the perfect wonderland roblox banner design requires a deep understanding of the game's unique aesthetic.
Developed over two long years, Wonderland has captivated players with its "Steam-like" visual fidelity, hyper-realistic graphics, and terrifying toy-carnival atmosphere. It is not just another blocky experience; it is a beautifully rendered nightmare. This guide will walk you through the essential visual elements, design techniques, and software tools needed to create a banner that stands out.
The Visual Aesthetic of Roblox's Wonderland
To design an authentic banner, you must first understand the visual themes that define the game. Unlike traditional, bright games on the platform, this experience leans heavily into dark, atmospheric horror. The environment feels like an abandoned, decaying amusement park mixed with a surreal dreamscape.
Player reports highlight that the game features a striking contrast between cute, whimsical characters and hyper-realistic, grotesque monsters. This duality is what makes the game's art style so memorable. When designing your graphics, you should aim to capture this unsettling blend of innocence and terror.
Key Visual Themes to Incorporate
- Decaying Carnival Elements: Rusting rides, dim neon lights, and cracked pastel paint.
- Chiaroscuro Lighting: High-contrast lighting with deep shadows and harsh, colorful highlights.
- Surreal Textures: Soft, plush fabrics juxtaposed with cold, metallic surfaces.
- Eerie Fog Effects: Low-lying mist that adds depth and a sense of isolation to the scene.
Key Characters and Assets for Your Banner
A great banner needs a strong focal point, and nothing works better than the game's iconic cast of characters. From the seemingly helpful to the outright terrifying, these entities provide excellent material for 3D rendering and graphic design.
Zippy: The Uncanny Guide
Zippy is one of the first characters players encounter. Described by the community as looking like a retro handheld device or a toy from an upcoming animated film, Zippy has an uncanny, expressive face. Including Zippy in your design adds an immediate layer of recognizable branding.
Wormy and the Lumens
The gameplay revolves around collecting glowing creatures called "Lumens" (such as Cloud Lumens) and feeding them to giant entities like Wormy. The contrast between the adorable, glowing Lumens and the massive, hungry monsters is a perfect concept for a dynamic banner composition.
| Character / Asset | Visual Description | Emotional Impact in Design | Recommended Placement |
|---|---|---|---|
| Zippy | Retro toy aesthetic, bright screen face, expressive eyes | Uncanny, nostalgic, slightly tense | Foreground (Left or Right) |
| Lumens | Small, glowing, cute pastel clouds or star-like shapes | Whimsical, magical, beacon of light | Midground (Scattered) |
| Wormy | Massive, hyper-realistic, wide-mouthed monster | Terrifying, overwhelming, chaotic | Background (Towering) |
| Balloon Zombies | Tiny, creepy mini-versions of the player character | Claustrophobic, annoying, swarm-like | Foreground (Creeping in) |
Technical Specifications for Roblox Banners
Before you begin importing assets and painting lights, you need to ensure your canvas is set to the correct dimensions. Different platforms require different aspect ratios to display your artwork without awkward cropping.
Using the right dimensions ensures your wonderland roblox banner looks crisp on mobile devices, tablets, and desktop monitors alike.
| Platform | Recommended Dimensions (Pixels) | Aspect Ratio | Safe Zone (Mobile Friendly) |
|---|---|---|---|
| Roblox Profile Header | 1200 x 480 | 5:2 | Center 800 x 480 |
| Roblox Group Banner | 960 x 540 | 16:9 | Center 640 x 360 |
| YouTube Channel Banner | 2560 x 1440 | 16:9 | Center 1546 x 423 |
| Discord Server Banner | 960 x 540 | 16:9 | Entire Canvas |
| Twitter / X Header | 1500 x 500 | 3:1 | Leave margins on left/bottom |
Step-by-Step Guide to Creating a Custom Banner
Creating a high-quality wonderland roblox banner involves extracting assets, setting up a 3D scene, rendering, and post-processing. Here is a streamlined workflow used by professional Roblox GFX artists.
Step 1: Extracting and Importing Assets
To get started, you will need the 3D models of the characters and map assets. Many creators use Roblox Studio to locate the official models or fan-made recreations. Once found, export them as .obj files.
To start rendering high-quality 3D assets, you can download the open-source software on the official Blender website. Import your exported models into Blender to begin the scene-building process.
Step 2: Scene Composition and Posing
Position your player character in the center, perhaps holding a map or a glowing Lumen. Position Zippy or Wormy looming in the background to create a sense of scale and danger.
- Rule of Thirds: Place key characters along the grid lines to guide the viewer's eye.
- Depth of Field: Blur the background slightly to make the foreground elements pop.
- Camera Angle: Use a low camera angle looking up at the monsters to make them feel more intimidating.
Step 3: Lighting the Scene
Lighting is the most crucial step in horror art. Instead of using flat, bright lights, use a three-point lighting setup with dramatic, colored lights.
| Light Type | Color Recommendation | Purpose in Scene |
|---|---|---|
| Key Light (Primary) | Cold Blue or Pale Teal | Mimics the moonlight/night sky, establishes base visibility |
| Fill Light (Secondary) | Deep Purple or Magenta | Softens shadows, adds a surreal carnival color palette |
| Rim Light (Backlight) | Neon Green or Bright Yellow | Highlights edges, separates characters from the dark background |
Step 4: Rendering and Post-Processing
Once your lighting and posing are complete, render the image at a high sample count to eliminate noise. Import the render into an image editor like Photoshop, Photopea, or Canva.
Add atmospheric effects like fog, lens flares on the glowing Lumens, and stylized text. When rendering your wonderland roblox banner in Blender, always render at a higher resolution than needed so you can crop it without losing quality.
Recommended Software for Designing Roblox Art
Whether you are a beginner or an industry veteran, having the right tools makes a massive difference in your workflow. Here are the top software choices for creating stunning banners.
| Software | License | Skill Level | Best Used For |
|---|---|---|---|
| Roblox Studio | Free | Beginner | Exporting character rigs and official game assets |
| Blender | Free / Open Source | Intermediate to Advanced | 3D modeling, rigging, posing, and realistic lighting renders |
| Adobe Photoshop | Paid Subscription | Professional | Advanced photo manipulation, color grading, and text effects |
| Photopea | Free (Web-based) | Intermediate | Quick, free alternative to Photoshop with similar features |
| Canva | Free / Paid Premium | Beginner | Easy layout design, adding text, and template formatting |
Tips for Making Your Banner Stand Out
With so many creators uploading content, your wonderland roblox banner needs to be eye-catching. Here are some pro-tips to elevate your design from average to extraordinary:
Emphasize the Glow
The Lumens are a central mechanic in the game. Make them emit a soft, magical glow that casts light onto your character's face. This creates a beautiful contrast against the dark, creepy background.
Use Stylized Typography
Don't settle for boring, default fonts. Look for distressed, playful, or horror-themed fonts that match the "twisted carnival" vibe. Add a subtle drop shadow or outer glow to make the text readable against complex backgrounds.
Keep the "Safe Zones" in Mind
As shown in our dimensions table, different devices crop banners in different ways. Always place your name, social handles, and primary character renders in the center "safe zone" so they don't get cut off on mobile screens.
Community Inspiration and Player Reports
According to player reports, the sheer difficulty of the game has made it a viral sensation. Creators who upload videos of their chaotic playthroughs have seen massive engagement. Having a polished, professional banner that captures this chaotic energy can significantly boost your channel's click-through rate.
Many GFX artists in the community share their work on Twitter (X) and specialized Discord servers. Studying how other artists handle the game's unique lighting can give you invaluable inspiration for your own projects.
Frequently Asked Questions
What is the official theme of the Roblox Wonderland game?
The game features a survival-horror theme set in a surreal, decaying amusement park. It blends whimsical toy aesthetics with hyper-realistic monster designs and challenging, puzzle-focused gameplay.
Where can I find official assets to make a wonderland roblox banner?
You can find character rigs and environmental models in the Roblox Creator Marketplace or by exporting them directly from Roblox Studio. Many community creators also share pre-rigged models on public design forums.
Can I use a wonderland roblox banner on Discord?
Yes! You can use these banners for your Discord profile or as a server banner. Just make sure to format the image to 960 x 540 pixels to ensure it fits perfectly without stretching.
What is the best color scheme for a banner based on this game?
The best color scheme utilizes dark, cool backgrounds (deep blues, purples, and blacks) contrasted with vibrant, neon accents (magenta, cyan, and glowing pastel yellows) to mimic the game's eerie carnival lighting.
Related Guides
Finding the Perfect Wonderland Roblox Background: Aesthetic Inspiration and Game Updates
Explore the latest on the highly anticipated Roblox Wonderland release and find the perfect Wonderland Roblox background to customize your digital space.
Uncovering the Dark Lore Behind Wonderland Roblox Images: A Deep Dive Into the Nightmare
Explore the chilling lore behind the viral Wonderland Roblox images and discover why this horror game is taking the community by storm.
Wonderland Roblox Fanart: How the Community is Responding to the Most Controversial Mascot Horror Release
Explore the world of Wonderland Roblox fanart, the community drama surrounding the game's release, and how artists are interpreting its high-quality visuals.
Wonderland Roblox Logo and Game Review: Why the Hype Didn't Match the Reality
We analyze the aesthetics of the Wonderland Roblox logo and dive into the polarizing gameplay experience behind the new horror title from ScaryPlay.